While I will create a new Laravel project to demonstrate how to send notifications (send emails via notifications) in Laravel, I will focus mainly on the notifications part and will not go deeper into How to create a new laravel project and how to set up authentication in a Laravel 7.x project.
So, let’s start.
Create a New Laravel 7.xx Project
Pull up your terminal and go to the folder where you want to create your new project.
Then, type the following command to create a new laravel project for our laravel notifications example.laravel new notificationsTest
Depending upon your internet connection, it might take a while (a few seconds to a few minutes) for the basic project to be setup.
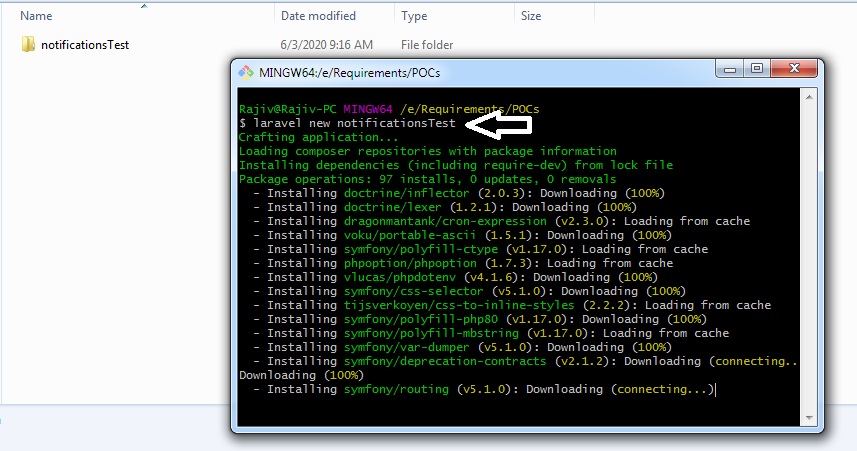
Once done, you will see the successful message on your terminal.
**If you are on Windows (like me), one of the best options to have something as powerful as a real terminal is to install GitBash.
Now, the first thing you should do is get inside your newly-created project directory by typing the following:cd notificationsTest
Once inside your project folder, the first thing that you need to do is fire up Laravel’s inbuilt deployment server by typing php artisan serve
Once the server is up and running, open your favorite browser and type the following URL in the address bar:
https://127.0.0:8000
And voila! Your laravel app is up and running!

Now that, our basic Laravel project is created and is up and running, we can move to our next step – creating Laravel Notifications.
However, we have to do one additional step before we move ahead. We have to set-up the authentication in Laravel.
Laravel Notifications and Users
Remember, for any sort of Larvel notifications to work, we need to have users create on our application. So, let’s go ahead and create our associated tables and users for our laravel application.
In order to do that, open a new terminal inside your project folder (do not close the terminal that is running the Laravel deployment server).
On the new terminal, type the following command to migrate the tables.php artisan migrate
But when you do that, you will come across an error that will look like this:
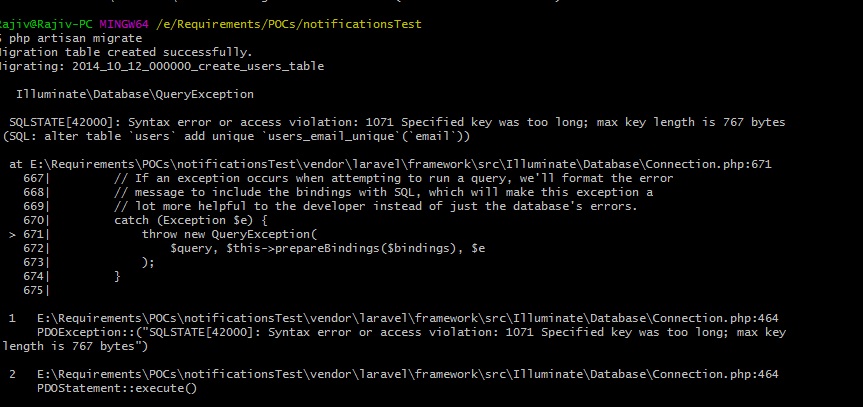
This is because we do not have any database yet that our laravel notification application can identify and talk to.
So, let’s go ahead and create a test database first.
I will do that on a MySQL server using phpMyadmin. You can use any of your preferred methods to connect your locally installed database server and create your laravel 7 notifications db.
**If you do not have a locally installed database server yet, I suggest XAMPP.
It’s a great way to install a pre-configured stack of Apache servers, MySQL servers, and phpMyadmin. This saves a lot of time as you do not have to go around installing everything one by one and then configuring them to make sure they are able to communicate properly, with each other.

Then, quickly create your local test database for the laravel 7 notifications example and create an associated user. Keep the username and password handy, we will need them in a bit. Finally, grant all privileges to this user.
With our backed part setup, open your favorite text editor and then add your project folder to it. I am using Sublime Text for this example.
Once inside your project folder, locate the .env file and add the username and password that you created in the previous step.
Your final .env file should look like this (below). Save the file and then pull up the terminal that is running the Laravel deployment server. For our laravel application to use the new values we just updated on the .env file, we will have to restart the server.

The two steps to re-start our laravel server are as follows:
1 – Press Ctrl + C to stop the server
2 – Type: php artisan serve to start the server
Now, go back to your other terminal where you had run your migrate command but it had failed.
Run it again and you should taste success this time. Your terminal screen should look like this on success.

If in case, you encounter an error with the following message, when you try to run php artisan migrate command, go through this quick fix to remove this error.
SQLSTATE[42000]: Syntax error or access violation: 1071 Specified key was too long; max key length is 767 bytes
Then, run the php artisan command one more time and it should work this time around.
Now with our user-related tables in place, the next step is to create the authentication scaffolding. I am using Laravel 7.x.x for this example so the command(s) to create Laravel scaffolding is different than what it used to be.
In order to create the Laravel auth scaffolding in Laravel 7, go to the terminal that you used to migrate the tables.
There, use the following commands to create the laravel auth scaffolding:composer require laravel/ui php artisan ui vue --auth npm install npm run dev
This again might take a little while as there are a lot of packages that will be pulled and installed.
Once installed, come back and refresh your webpage and you will see two new links, REGISTER & LOGIN at the top right corner.

Now, for notifications to work, there must be at least one registered user. So, let’s go ahead and register on the website by clicking the ‘Register’ button and fill up the registration form.

On successful registration, you should already be logged in. Now the next step is to finally, create our first notification.
Let’s do that by typing the following command on the terminal:php artisan make:notification loginCompleted
Once successfully created, pull up your code editor where you had added your project, and under the ‘app\Notifications’ folder of your project’s root directory, you should be able to see your newly created notification.

Now, let’s make the notification work.
Okay, before we proceed, let me tell you that while in this quick guide, we are only talking about how to use notifications in laravel 7 for email.
Laravel notifications can be used to do way more than that. We can save the data in the DB instead/along with sending email notifications, we can create facebook-like notifications, etc.
Ok, now back to the code.
Open the ‘web.php‘ file to create a route for our notification and add make sure your route file looks like this:

Don’t forget to add the following reference at top of the web.php file:
use Illuminate\Support\Facades\Notification;
Notice at the top, we have added our Notification and the App\user so that both these are available in our web.php file.use App\Notifications\loginCompleted;
use App\User;
Also, notice that to create a notification in Laravel, all we had to write was this one single line:
User::find(1)->notify(new loginCompleted); //Assuming there is an user with ID = 1
Now, let’s go and try to see it in action.
Since the notification is supposed to fire when the ‘/home’ route loads, in this case, the page you should be on, one which you were taken to after login.
Refresh the page and see what happens.
You will see an error message like this:
Cannot send message without a sender address
This is because we haven’t yet set the email configuration for our laravel app.
In the real world, we will use real SMTP details but for our purpose here, we will use mailtrap.io, a fake SMTP testing server.
If you don’t already have an account there, go make one and come back with your username & password.
The go to the .env file and change the following:

Now that you have made changes to the configuration file (.env file), you will have to restart the deployment server for Laravel to pick up the new changes.
Do that and then refresh the page that had given you the error last time. This time, you should see no error messages and the page should load fine.
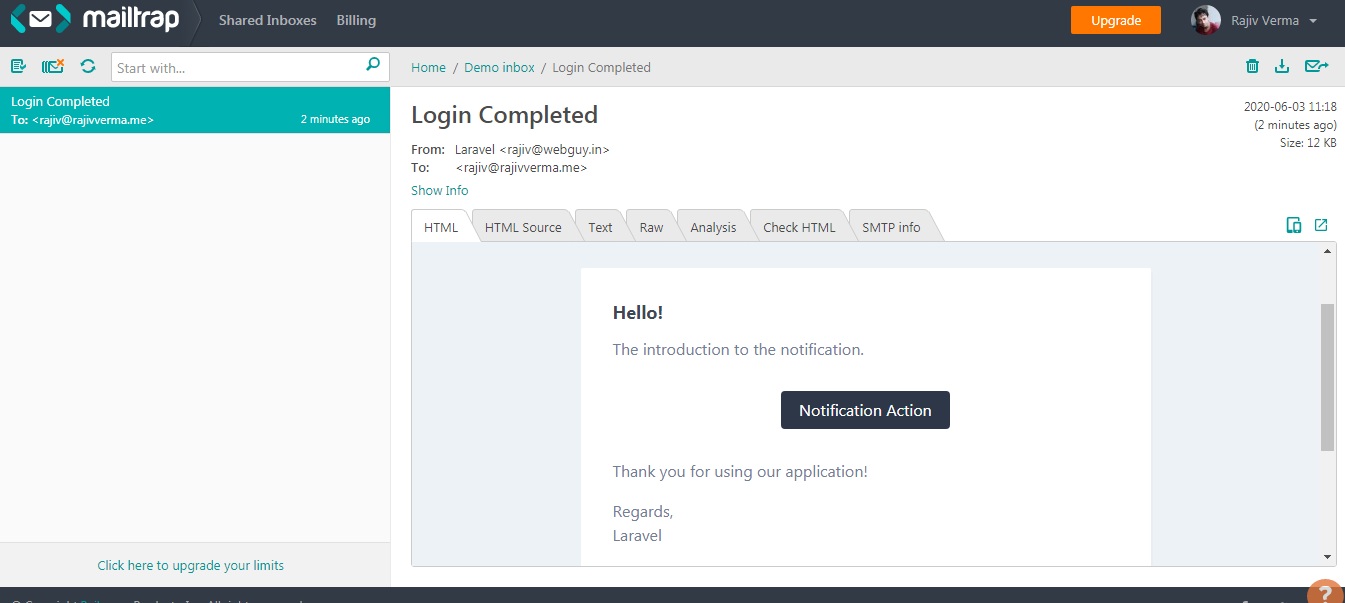
But that’s not what we are bothered about here. Go to your mailtrap.io inbox and refresh it.
And voila!
You should have your notification email here.
The complete working code for this simple exercise can be downloaded from here.
I hope this helps. Maybe I will write another sequel to this post about how to show Facebook-style notifications using laravel.
Also Read: How to send emails via Laravel Queue?
Please feel free to ask any questions in the comments regarding this article and I will be more than glad to help you with the same.


3 thoughts on “How to send notifications in Laravel 7.x?”
Pingback: [SOLVED] Cannot Start Apache Server On XAMPP. Port 80 Blocked By PID 4!
Pingback: How To Create A New Laravel 8 Project via Terminal?
Pingback: How Io Implement Laravel Queues To Send Emails and Not Spoil The User Experience? - Rajiv Verma