
In the past couple of months, Ihave recently found myself in a situation where I had to create forms that needed fields to be dynamically. Up until now, I have used jQuery form fields repeater to get the job done.
While that has worked fine always, the code needed to achieve this is not always the cleanest to read. So, when I had to do something similar again, I thought of going with Laravel Livewire this time around.

Using Livewire To Create a Form with Repeating Form Fields
For this article about how to create a dynamic input fields using Livewire, I assume that you already have a new Laravel project set-up and you already know how to install Livewire in a Laravel project.
So, I will directly begin with creating our Livewire component. To create our RepeaterForm Livewire component, we will use the command below;
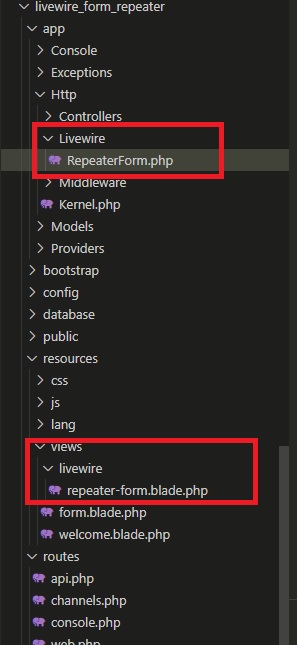
php artisan make:livewire RepeaterFormThis will create 2 files as shown in the picture below:
We will be using this Livewire component of our’s in form.blade.php, so, we have to first bring in Livewire in this page. To do that, we will add @livewireStyles just before the ending </head> tag. This will bring in the Livewire styles to our form.blade.php.
Next, we will add @livewireScripts just before the </body> tag and we are done hooking up Livewire to our project.
Creating The Repeater Form
Let’s now create the dynamic form that will create dynamic form fields.
Go to the views/livewire/repeater-form.blade.php and paste the following code there.
<div>
<form class="row px-4 container" action="{{ route('images.submit') }}" method="POST" enctype="multipart/form-data">
@csrf
@foreach ($images as $index => $item)
<div class="col-md-4">
<label for="name{{ $index }}" class="form-label">First name</label>
<input type="text" class="form-control" id="validationCustom{{ $index }}"
wire.model="images{{ $index }}.name" name="name[{{ $index }}]" required>
<div class="valid-feedback">
Looks good!
</div>
</div>
<div class="col-md-4 py-1">
<label for="formFile{{ $index }}" class="form-label">Upload File</label>
<input class="form-control" type="file" name="formFile{{ $index }}"
id="formFile{{ $index }}">
</div>
<div class="col-md-4">
<label class="form-label"> </label>
<div class="row">
<div class="col-3">
@if ($index > 0)
<button class="btn btn-danger form-control"
wire:click.prevent="removeImage({{ $index }})">X</button>
@endif
</div>
<div class="col-9">
</div>
</div>
</div>
@endforeach
<div class="col-12">
<div class="form-check py-2">
<input class="form-check-input" type="checkbox" value="" id="invalidCheck" required>
<label class="form-check-label" for="invalidCheck">
Agree to terms and conditions
</label>
<div class="invalid-feedback">
You must agree before submitting.
</div>
</div>
</div>
<div class="col-3 py-4">
@if ($index <= 4)
<button class="btn btn-warning form-control" wire:click.prevent="addImage">+ Add More</button>
@endif
</div>
<div class="col-12">
<button class="btn btn-primary" type="submit">Submit form</button>
</div>
</form>
</div>
The code is very straightforward. We are creating a form with a text input field and a file upload field, alongwith a couple of buttons to add and remove controls from the form. We also create a Submit button as part of the button, to post the submitte data, to the backend.
Next, open the Http/Livewire/Formrepeater.blade.php file and paste the following code there:
<?php

namespace App\Http\Livewire;

use Livewire\Component;

class RepeaterForm extends Component
{
    public $images;

    public function mount()
    {
        $this->images =   [1];
    }
    public function addImage()
    {
        $this->images[] =   [1];
    }
    public function removeImage($index)
    {
        unset($this->images[$index]);
        array_values($this->images);
    }
    public function render()
    {
        return view('livewire.repeater-form');
    }
}
The above is a very small and simple bit of code but might look a little confusing to you, if you are not very familiar with how livewire works. In order to understand that in short, let’s have a quick look below:
jQuery Repeater vs Livewire Repeater Fields : The Difference
While it might seem to us that both jQuery form repeater and Laravel form repeater are doing the same job, which is not entirely wrong, the main difference lies in how both jQuery and Livewire perceive the problem.
When creating a form repeater in jQuery (or any JavaScript method), what we essentially do is, we add or remove the form fields. In other words, we manipulate the DOM to make add / remove fiields.
In Livewire, however, we make our decisions based on a data-driven approach. To put it simply, in jQuery, we simply copy/remove DOM elements when adding or removing controls. But since Livewire components are tied closely to an underlying data source, in order to add or remove elements, we need to add / remove values to / from the datasource it is bound to.
If you see the code shared above, you will notice that when we do and addImage, we actually add an element to the $images array which is the datasource of our Livewire component. Similarly, when we do removeImage, we actually remove the item from the array.
Getting The Form Data
Once the form is filled and submitted, you can grab all the data posted from the Request object, just like you would do in Laravel. For this example, this is where I have done it.
Route::get('form', function () {
    return view('form');
});

Route::post('form-submit', function (Request $request) {
    dd($request);
})->name('images.submit');
As a bonus, I have also added small checks to ensure that if the form has only 1 set of repeatable fields, that you do not see the delete button.
And that should be it. If you wish to download this project and see for yourself, how it all works, feel free to download it from GitHub, here.


3 thoughts on “How To Create A Repeater Form Using Livewire?”
Pingback: A CSS-only Hamburger Menu, aligned To The Right - Rajiv Verma
Pingback: [SOLVED] Livewire Installed But Laravel Livewire Not Rendering - Rajiv Verma
Pingback: How To 'Show More' content on Button Click using Alpine.js - Rajiv Verma