
Currently, I am working on a project where there’s a blog section. The user should be able to log in and then come and create new blog posts and publish them among many other things she can do. Now since it was the question of a blog post and not a regular few lines of plain text, I needed a Rich Text Editor for Laravel (WYSIWYG editor) with image upload capabilities.
As this project was not a WordPress based project, in which case, I would not even have to bother about it as WordPress comes with one of the best WYSIWYG editors. So, I began a quick search based on what I already knew and found that TinyMCE and CKEditor are the two that I like, to be used on my Laravel 7 project. I decided to go ahead with CKEditor.
Downloading, Installing and Configuring CKEditor on Laravel 7
As it turns out, CKEditor is offered in multiple versions. Version 5 looked really neat so I first downloaded it and set it up, only to realize that image upload and file management on CKEditor 5 needed some work. I needed something which I can set up very quickly, in a matter of a few minutes. So, I decided to go with CKEditor 4.x.
Setting up CKEditor in its vanilla version takes just a few seconds!
But the main feature that I was looking for was inline-image upload for blog posts. And to do that, there’s a little bit of work involved. More on that, later. For now, let’s get the CKEditor up and running.

<script src="//cdn.ckeditor.com/4.14.1/standard/ckeditor.js"></script>I added the above line to the top of the view file I needed the CKEditor on.
Next, you have to make sure there is a <textarea> element on the page. This element will be replaced by the CKEditor.

<div class="form-group row">
                                    @if(!Auth::user()->isAdmin)
                                        <label for="blog-post" class="col-sm-3 text-left control-label col-form-label">Blog Post</label>
                                        <div class="col-sm-12">
                                            <textarea id="blog-post" name="blog-post" class="blog-post form-control @error('blog-post') is-invalid @enderror"
                                            rows="10" cols="80" placeholder="Write your blog post content here" required></textarea>
                                        </div>
                                    @endif

                                </div>
Then, at the bottom of the page/view, I had to attach ckeditor to the <textarea> element declared above.

<script>
    //CKEDITOR.replace( 'blog-post');
</script>
At this point, the vanilla version of your CKEditor should be up and running. Save the changes and refresh your page where you placed your CKEditor-code and you should see a Rich Text Editor in place of your element. Almost all the options that you see on the toolbar of the editor are working, and you can even access the data in your controller just the way you would have access in case of your <texearea> element.
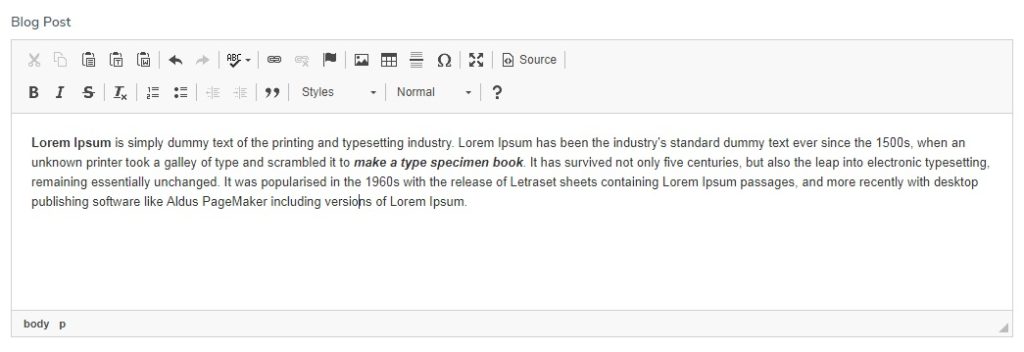
However, if you click on the image icon on the editor’s toolbar, you will not see an option to ‘upload’ just yet. For now, you can only use direct links to images, to add an image in the post.
Upload images with CKEditor in Laravel Project
As mentioned above, my main intention was to allow users the facility to upload through the editor. So, I had to do a few extra things to get that feature up and running. But thankfully, nothing here was time-consuming.
One of the plugins that CKEditor tries to push for image upload feature is called easyimage. At first look, it looked pretty cool but then I discovered that, in order to use that, you will have to subscribe to their CDN service where the images are uploaded to and then served from. I did not intend to do that so I quickly junked the easyimage plugin and started working on the default image upload feature of CKEditor for Laravel.
In order to do that, first I had to create a route in my wep.php file. This route was for the function that uploads the image(s) to the server.

Route::post('/dashboard/member/blogpost/uploadimage','BlogPostsController@uploadimage')->name('uploadimage');Then, go to the script section where you had attached the CKEditor to your texearea element. Replace the code there with the following:
<script>
    //CKEDITOR.replace( 'blog-post');
    CKEDITOR.replace( 'blog-post',{
        filebrowserUploadUrl: "{{route('uploadimage', ['_token' => csrf_token() ])}}",
        filebrowserUploadMethod: 'form'
    });
</script>
The route here is the route you created in the last step. Also, after passing the ‘filebrowserUploadMethod’ parameter, you will be able to see an ‘upload’ option when you click the image icon on the editor’s toolbar.
Creating the ImageUpload Laravel controller for CKEditor
Then, in your controller, create the ‘uploadimage‘ function. The code is given below:
public function uploadimage(Request $request)
    {
        if($request->hasFile('upload')) {
            $filenamewithextension = $request->file('upload')->getClientOriginalName();
            $filename = pathinfo($filenamewithextension, PATHINFO_FILENAME);
            $extension = $request->file('upload')->getClientOriginalExtension();
            $filenametostore = $filename.'_blog_image_'.time().'.'.$extension;

            //Upload the file
            $request->file('upload')->storeAs('public/images/members/foldername/blog-images', $filenametostore);

            $CKEditorFuncNum = $request->input('CKEditorFuncNum');
            $url = asset('storage/images/members/'.$memberNameFolder.'/blog-images/'.$filenametostore);

            $msg = 'Image added successfully';
            $re = "<script>window.parent.CKEDITOR.tools.callFunction($CKEditorFuncNum, '$url', '$msg')</script>";

            @header('Content-type: text/html; charset=utf-8');
            echo $re;
        }
    }
That’s all that you need to do. Go give it a try and you should be easily upload image(s) through your ckeditor.
And that is all, you should be now able to upload.


2 thoughts on “How to use Rich Text Editor (CKEditor) in Laravel 7, 2020?”
Pingback: How to create a custom 404 page in Laravel 7.x? | Rajiv Verma
Pingback: How to upload multiple images files in a Laravel website?