While GitHub has been telling us about it for a while now, sometime last month GitHub finally discontinued allowing the usage of a username-password combo to login to any repository via the terminal and instead, moved to use personal access tokens.
This directly affected me as my workflow heavily involved cloning and pulling repositories on multiple remote production servers and local test/ development machines. So, as you can see, all the procrastination did not work and I had to change the way I was doing things once I was not allowed to use a username & password to access my GitHub repositories anymore.
How to setup Two-Factor Authenticaion on GitHub?
Ok, so when GitHub moved to token-based authentication, what it essentially did was made two-factor authentication on GitHub compulsory. So, as you might already have guessed by now, in order to be able to use token-based authentication to pull/push/clone on GitHub, you will first have to enable 2 Factor Authentication (2 FA) for your account.
Setting it up is a straightforward process. The process is listed below:
Begin by going to the ‘Settings’ of your GitHub account.
Go to the top right and click on your profile icon. Then go all the way to the bottom and click Settings.
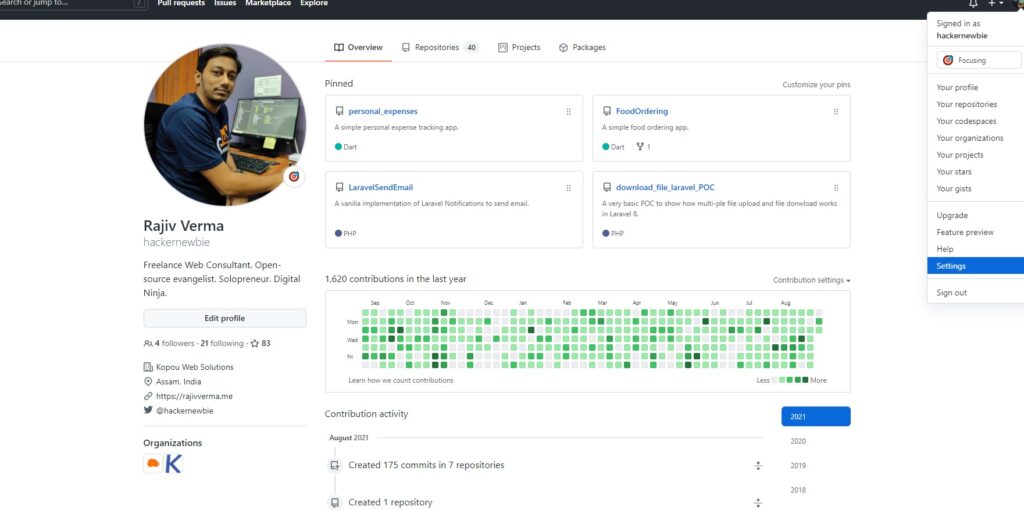
Go to GitHub Settings page to enable 2-factor Authentication
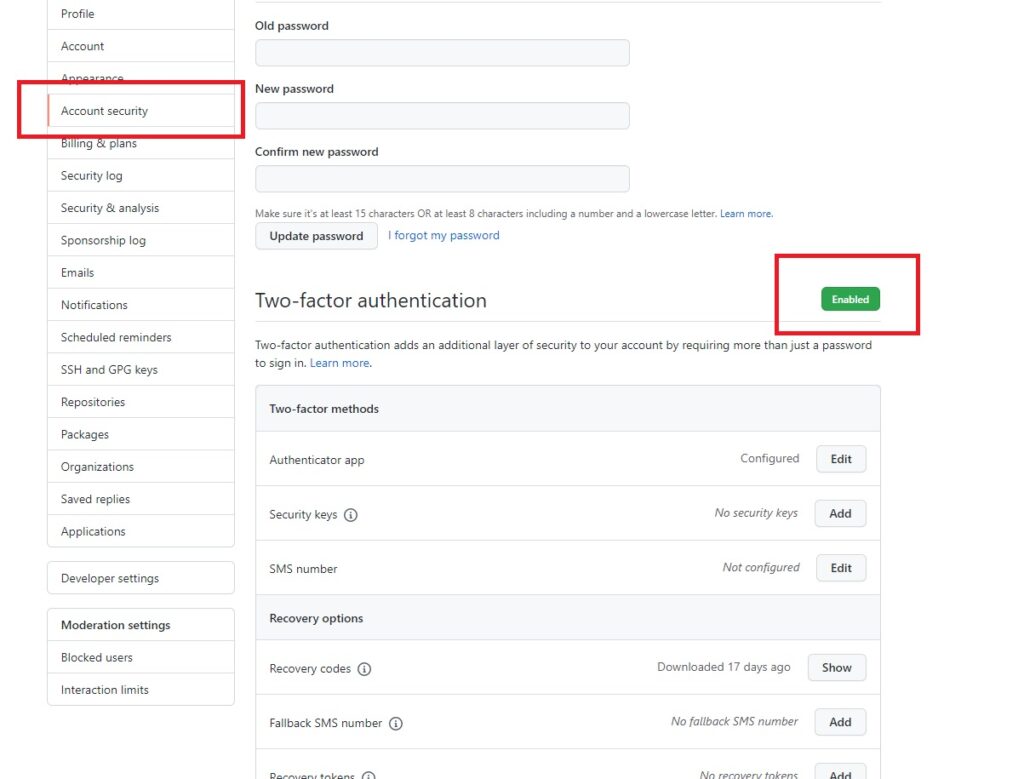
Go to Account Security To Enable Two Factor Authentication
In order to proceed with enabling token-based authentication, you should first enable Two Factor Authentication (2 – FA) for your account. To do that, on the Settings page, where you should be now, click on the link that says Account Security. It will be under the Account Settings menu on the left. Once there, if your account has 2FA already enabled, you will see a message in green, saying the same. Otherwise, you will have to click the relevant button to enable 2 Factor Authentication.
You will be asked to choose your Two-factor Method. While you can always choose SMS Number so that you receive an OTP-like code whenever you wish to login, choosing the Authenticator App is a much better option. If you don’t already have the Google Authenticator app installed on your phone, you will have to do it first, before proceeding.
Once installed on your phone, move to the next step, here on GitHub and you will be asked to scan a barcode. Scanning this will hook up your app with your GitHub account, as its two-factor device.
Go to Developer Settings to Generate GitHub Access Token
While on the Settings page of your account, scroll down a little more until you find a link that says Developer Settings. It will be all the way towards the bottom, on the left-hand side of the Developer Settings page. Click that and you will be taken to a page that will look like this.
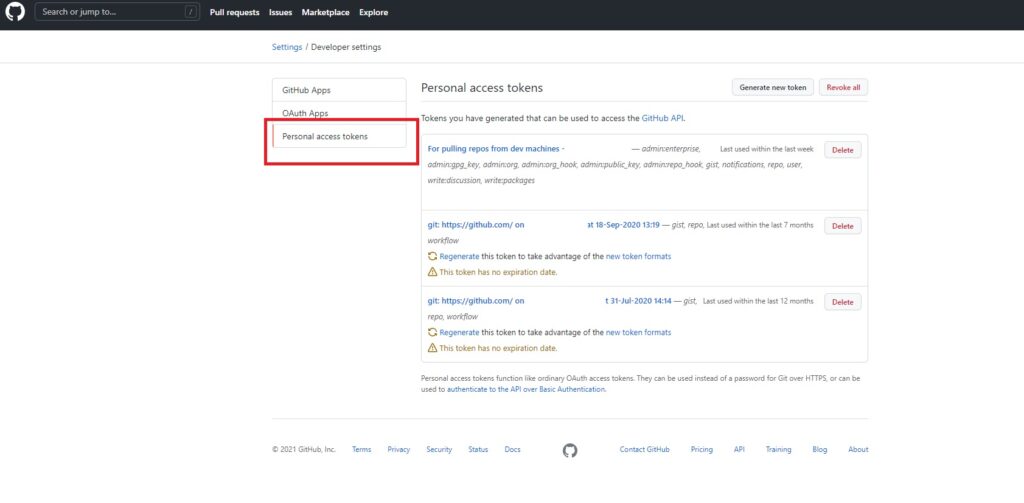
Here, towards the top right of the page, there will be a button that says Generate new token. Click that and give the token that you want to create, a bride description. Also, set an expiration timeline for the token.
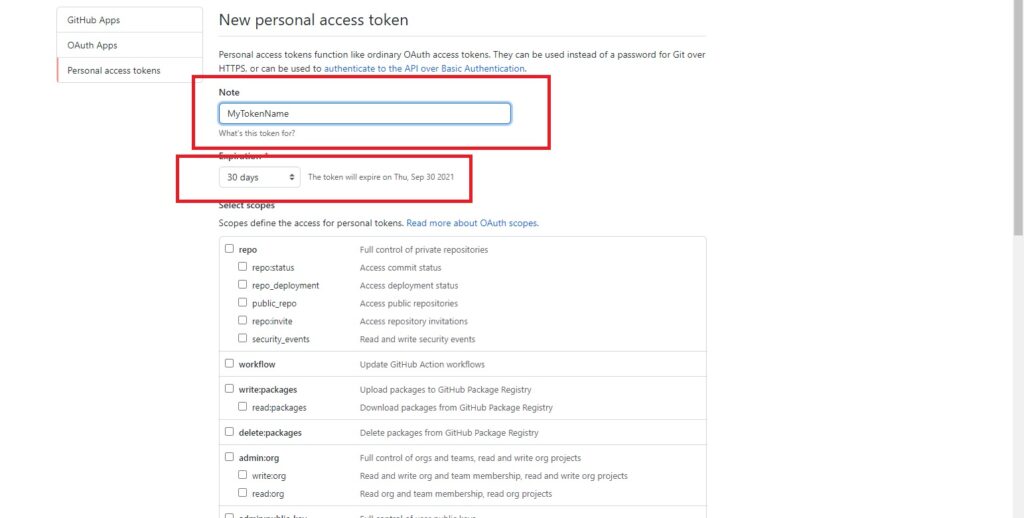
Scroll to the bottom of the page and click Generate token.
Once the page reloads, you will see your auth token has been generated. It will look something like this – eyJhbGciOiJIUzI1NiIsInR5cCI6IkpXVCJ9.
Copy it and save it somewhere safe.
NEVER SHARE YOUR AUTH TOKEN WITH ANYONE.
How to use GitHub Auth token?
Now that you have your auth token with you, you are ready to use it. Try cloning any private repository that you might have under your account, via the terminal.
When prompted for the username, enter the same or you can also enter your auth token here. Hit enter.
When prompted for the password, enter the same token again.
And, Voila!


1 thought on “How To Use Auth Token To ‘git pull/push/clone’ With Two Factor Authentication?”
Pingback: [SOLVED] Livewire Installed But Laravel Livewire Not Rendering - Rajiv Verma