
This topic is divided into 2 parts. The parts are as follows:
1 – Creating a Firebase Project
2 – Configuring the Flutter app and making it work with Google SigIn
This article resumes where we left in this article which talks about how to create a Firebase App.
Once the Google Firebase app is created as per the details in the above-mentioned article, we will proceed to generating and attaching the debugging certificate, the package name, and registering the app.
Add Unique Package Name and Add To Google Firebase Project
In order to do that, as a first step, go to the \android\app\build.gradle file of your project’s root directory and give it a unique project name.
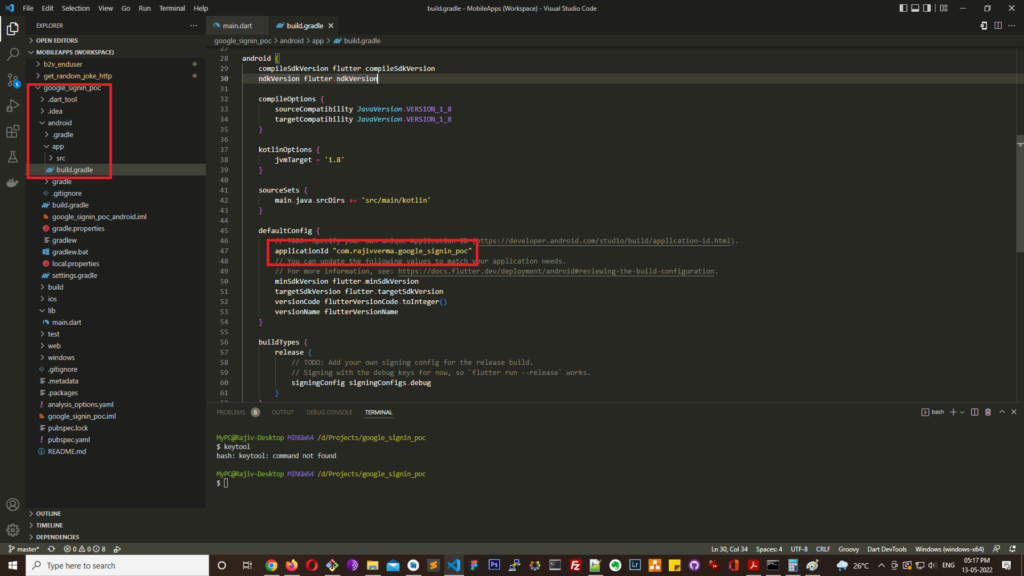
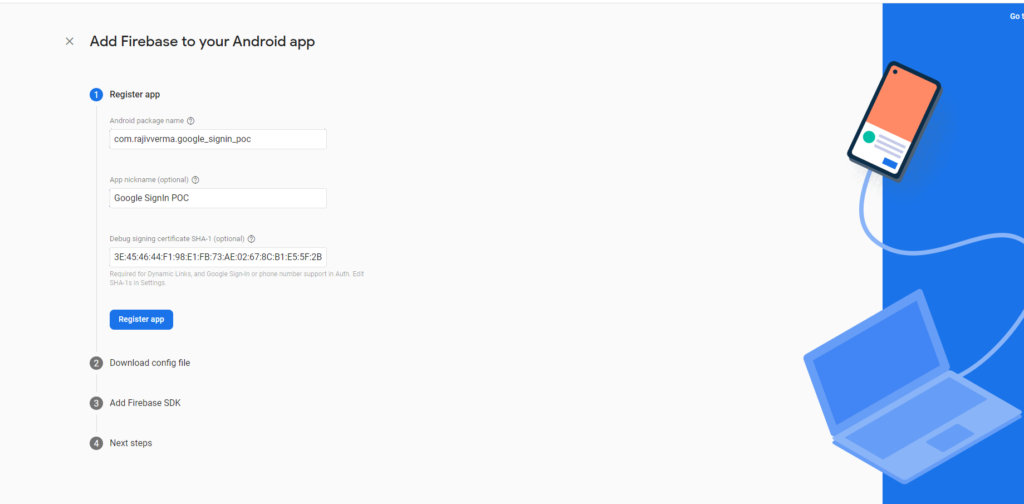
Copy this name and paste it on the Firebase page as shown below:
Generate SHA-1 certificate for Firebase Project
Next, we will need to generate the SHA-1 certificate. In order to do that, open your terminal and run the following command:
keytoolIf keytool does not run or throws an error, you either don’t have JDK installed or the path to JDK isn’t present in your system’s PATH environment variable. In such a scenario, stop what you are doing here, install JDK on your system and then add it to the system’s PATH variable. There are many great articles about how to Install Java and update the PATH variable. Follow one of those and you should be good.
Once done, type the keytool command again, on your terminal.
This time, if all had gone fine with your Java Installation and PATH variable updation, you should not get any error.
Now, go to this link here, and scroll down to the section where it says To get the debug certificate fingerprint. From here, depending on whether you are running macOS or Windows, copy the respective version of the code and run it in your terminal.
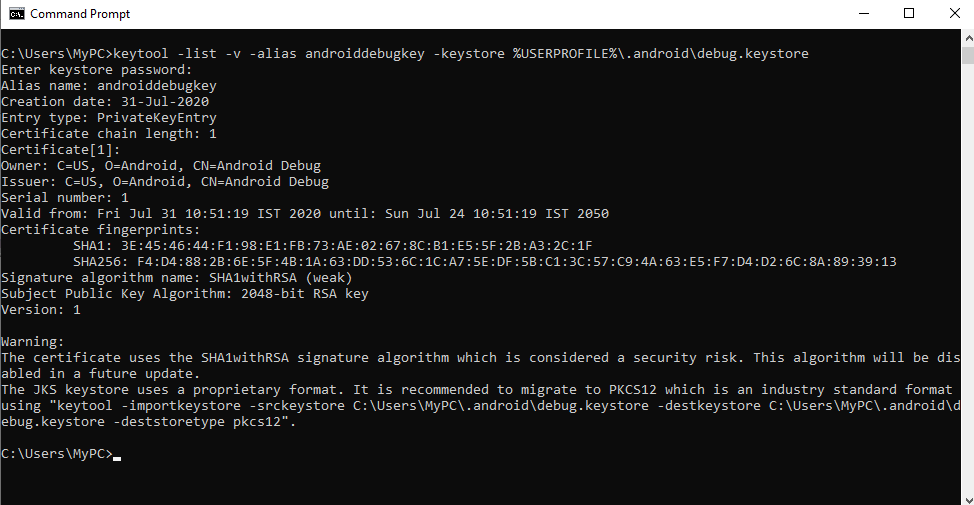
I am on Windows for this example so, I will run the following code:
keytool -list -v -alias androiddebugkey -keystore %USERPROFILE%\.android\debug.keystoreIf prompted for a password, enter ‘android’.
On a successful run, you should see something like this:
Copy the bit of text next to SH1 and go back to your Firebase Project setup page and paste it there in the relevant field (refer to the second picture from above).
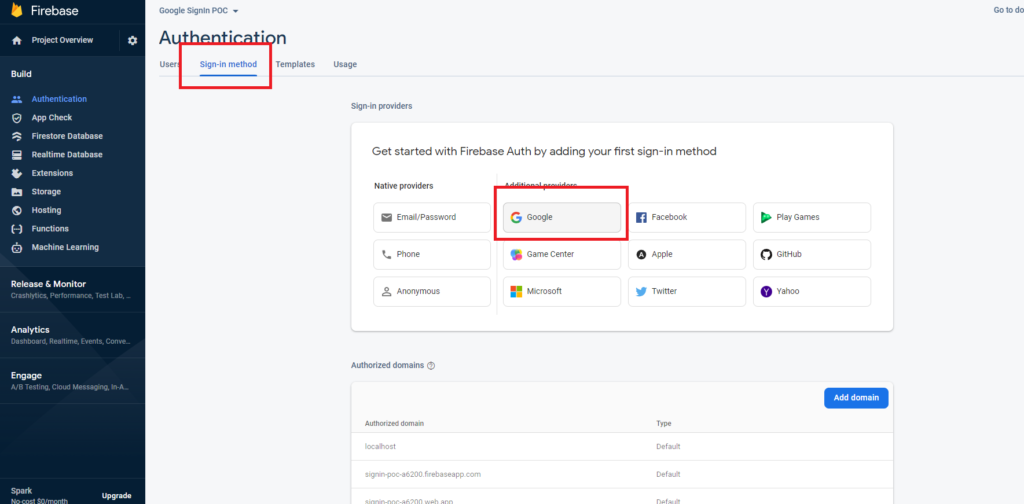
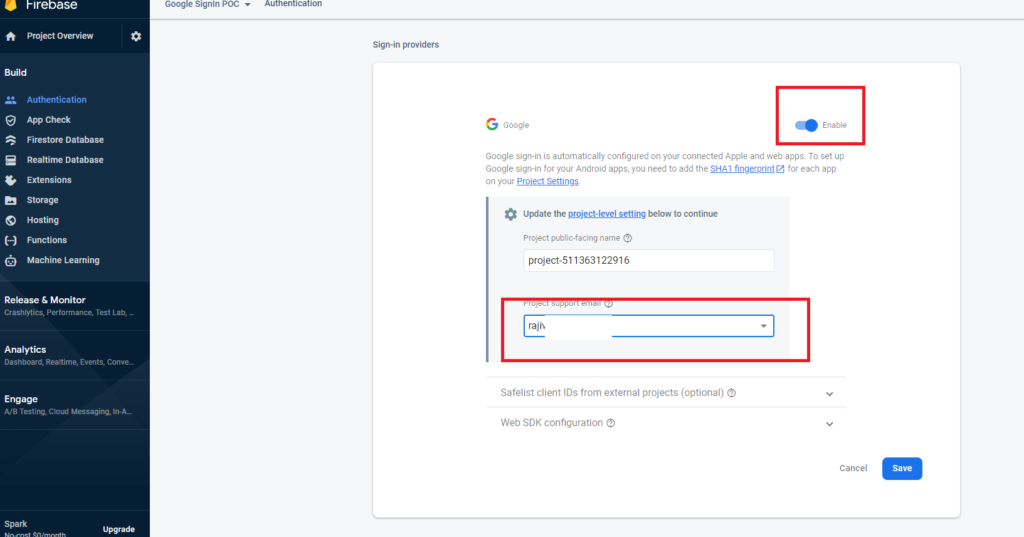
Enable Google Sign In On Firebase
Once this is done, we will have to now enable Authentication for our Firebase project and also set up the auth provider. Follow along to see how to do it.
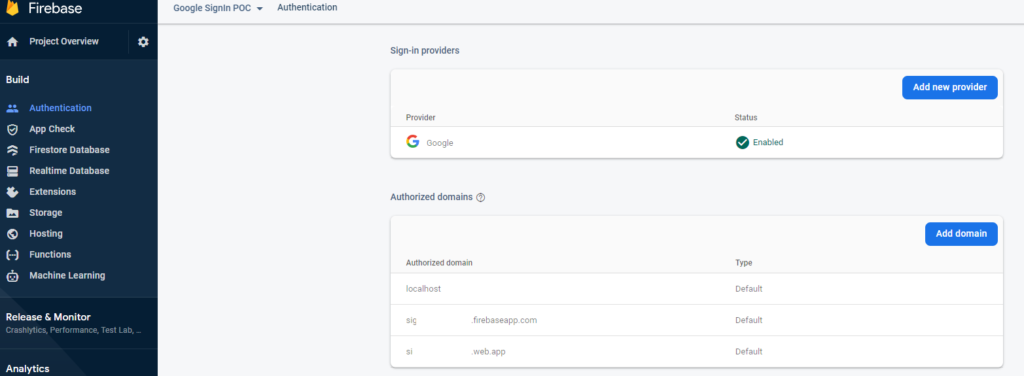
Once that’s done, we are kind of done at the Firebase end. Now, let’s move to our Android studio.
As a first step, we will go to the \lib\main.dart file and delete everything from below the main() function.
Actually, replace the entire code on the main.dart file with the code below:
import 'package:google_sign_in/google_sign_in.dart';
void main() {
runApp(const GoogleSignInPOC());
}
class GoogleSignInPOC extends StatefulWidget {
const GoogleSignInPOC({Key? key}) : super(key: key);
@override
State<GoogleSignInPOC> createState() => _GoogleSignInPOCState();
}
class _GoogleSignInPOCState extends State<GoogleSignInPOC> {
GoogleSignIn _googleSignInObj = GoogleSignIn(scopes: ['email']);
@override
Widget build(BuildContext context) {
GoogleSignInAccount? thisUser = _googleSignInObj.currentUser;
print(thisUser == null ? thisUser : thisUser.displayName);
return MaterialApp(
home: Scaffold(
appBar: AppBar(
title: Text('Google SignIn POC - ' + (thisUser == null ? ' You are not Logged In' : ' Hello ' + thisUser.displayName.toString())),
),
),
);
}
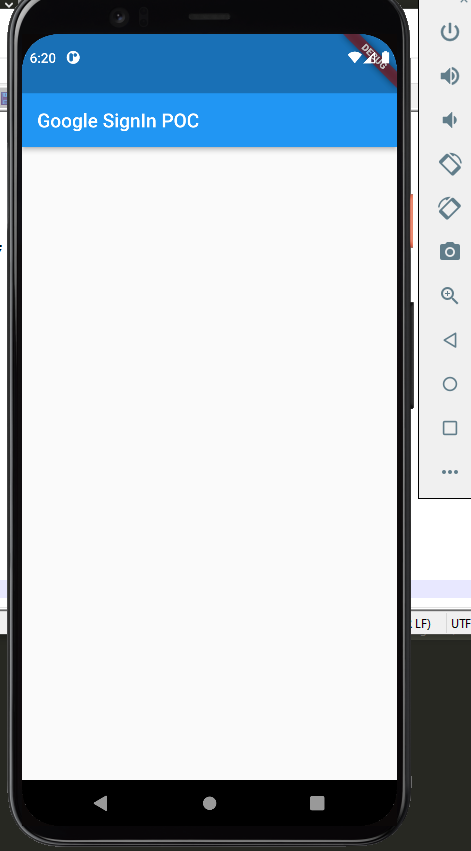
}Reload the simulator and you should see something like this:
Next up, install the Google SignIn plugin. To do that, run the following command in the terminal inside your project root:
flutter pub add google_sign_in
Or, you can add it to the pubspec.yaml file of your project, exactly how it is mentioned below:

Save the file and flutter pub get should automatically run. In case it doesn’t, just run it once.
Now, come back to our main.dart file and add the plugin we just installed to the project, by adding the following line towards the beginning of the page:
import 'package:google_sign_in/google_sign_in.dart';We will do some very basic UI changes to add 2 Elevated buttons, one for Signing In and the other for Signing Out.
What we do here, based on whether the user is logged in or not, we show relevant text on the app bar.
We also show hide the Sign In / Sign Out buttons based on whether the user is already logged in or not.
The complete code of main.dart would look like this.
import 'package:flutter/material.dart';
import 'package:google_sign_in/google_sign_in.dart';
void main() {
runApp(const GoogleSignInPOC());
}
class GoogleSignInPOC extends StatefulWidget {
const GoogleSignInPOC({Key? key}) : super(key: key);
@override
State<GoogleSignInPOC> createState() => _GoogleSignInPOCState();
}
class _GoogleSignInPOCState extends State<GoogleSignInPOC> {
GoogleSignIn _googleSignInObj = GoogleSignIn(scopes: ['email']);
@override
Widget build(BuildContext context) {
GoogleSignInAccount? thisUser = _googleSignInObj.currentUser;
print(thisUser == null ? thisUser : thisUser.displayName);
return MaterialApp(
//theme: ThemeData(colorScheme: Colors.black),
home: Scaffold(
appBar: AppBar(
title: Text('Google SignIn POC - ' + (thisUser == null ? ' You are not Logged In' : ' Hello ' + thisUser.displayName.toString())),
),
body: Center(
child: Column(children: [
thisUser == null ?
ElevatedButton(
onPressed: () async {
await _googleSignInObj.signIn();
setState(() {});
},
child: Text('Sign In'),
)
:
ElevatedButton(
onPressed: () async {
await _googleSignInObj.signOut();
setState(() {});
},
child: Text('Sign Out')),
],)
),
),
);
}
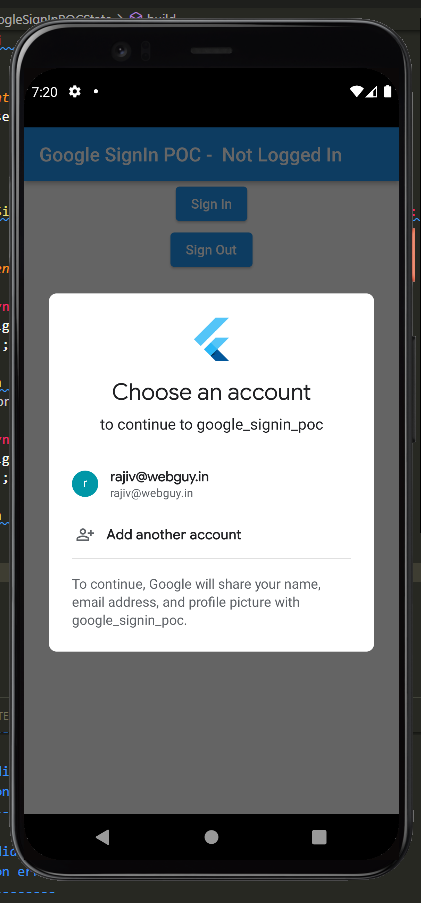
}And the final app, at work, would look like this:
You can download the complete code of this application from here.
** Please note that Google SignIn will not run on emulators that don’t have Google Play Store.


2 thoughts on “How To Use Google Sign In Flutter?”
Pingback: How I Created a Flutter App Without Writing ANY Code, using ChatGPT? - Rajiv Verma
Pingback: How To Access Phone Contacts in Flutter? - Rajiv Verma