
For obvious security reasons, phpMyAdmin can only be accessed via the local system, through 127.0.0.1.
However, when we are setting up a new stack, we need to access the database, and accessing the MySql database via the console isn’t always the most time-saving way of doing it.
Thankfully, we can connect to a remote MySql server from our local computer by doing a few simple things.
Let’s see in detail, what are the steps to connect to a remote MySQL server via phpMyAdmin from a local computer.
How to access phpMyAdmin on Amazon EC2 / Lightsail Instance (Ubuntu)?
The steps to access phpMyAdmin for an Amazon Web Services instance are as follows:
- Download and install PuTTY.
- Download your SSH key for your Amazon Instance.
- Convert your .pem SSh key to a .ppk SSh key using PuTTY Generator.
- In PuTTY, enter your server IP and port number.
- Enter your auto-connect username on PuTTY.
- Set up Auth on PuTTY and add your SSh file.
- Create an SSh tunnel to your remote server from your local machine.
- Save your configuration.
- Connect & verify.
Step by step procedure to connect to remote Amazon Webservice (AWS) MySQL database via phpMyAdmin
As a first step, download and install PuTTY if you don’t already have it.
Once PuTTY is installed on your system, make sure you have the SSH key for the AWS instance you where have your MySQL database. I assume you already have your SSH key for your Amazon EC2 Instance or for your Amazon Lightsail instance.
The downloaded SSH key file will most probably be in the .pem version, you first have to convert it into a .ppk file as .pem files are not recognized by PuTTY.
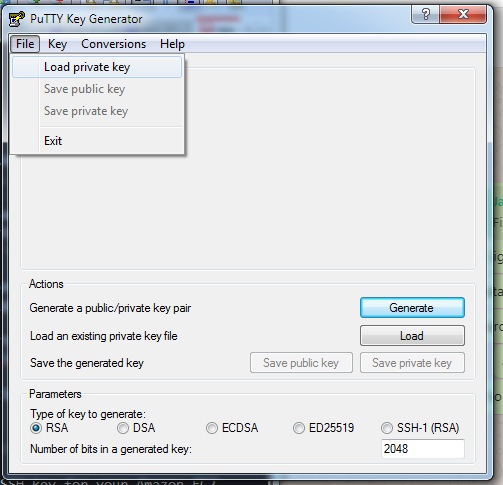
How to convert a .pem file to .ppk file using PuTTY Generator?
In order to convert the .pem file to a .ppk file, fire up PuTTY Generator (it comes with PuTTY), check your All programs/Start menu and you should find it. In the PuTTY generator, load your .pem file. You will see the key in the PuTTY generator window. You can either hit Generate or just hit save [Save as Private Key] and give it a name. This time, it will have a .ppk extension that can be used with PuTTY.
Configure PuTTY to connect to your Amazon Lightsail Instance (AWS)
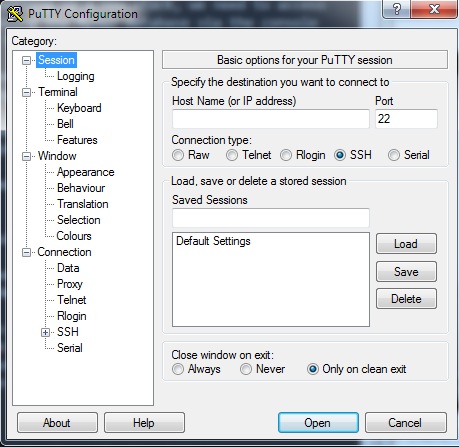
Now that you have your .ppk key file, open PuTTY, and click on Host. Then on the right, enter your server’s IP address. You can get this from your AWS Instance page. Leave the rest of the fields unchanged. Make sure the port number is 22.
Also read: How To Install PuTTY on MacBook Air M1?
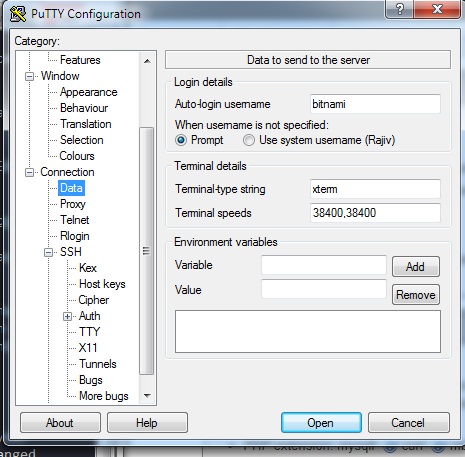
Then come down to Connection->Data and enter your username. Since mine is a Bitnami stack on a Lightsail instance, my username is ‘bitnami‘. This username will automatically be used to connect to your AWS instance.
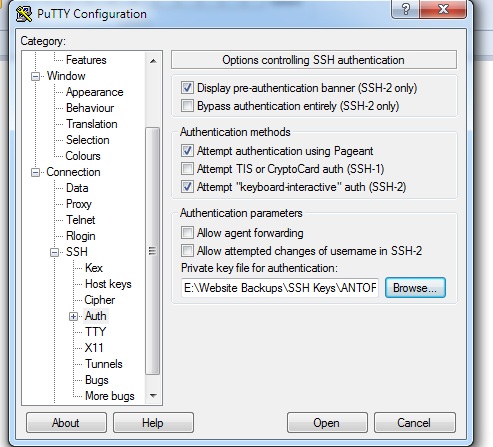
Now, come down to SSH->Auth and then click on Browse to add your key file (.ppk) that you had generated and saved in the step described above.
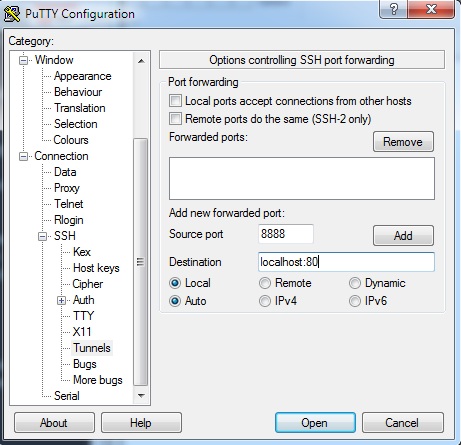
After adding the key file, move to SSH->Tunnels. Here on the right, enter 8888 in the Source port field. In the Destination field, enter localhost:80.
We are almost done here with the configuration. Now go back to Session, on the right, select your server IP that should be listed on the right, and click Save to save the configuration. And we are ready to go.

Now it’s time to test and verify to see if we have done everything correctly. To do that, click Open and a terminal should open up and you should be automatically logged in to your remote server.
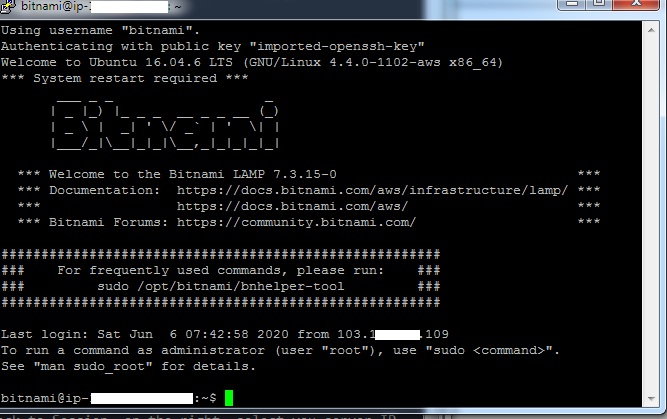
So far so good. We have been successfully connected to our remote AWS instance.
Now, let’s see if we have set up the SSH tunnel correctly.
To verify everything has worked as expected, open your browser and type 127.0.0.1.:8888/phpmyadmin. If all is well, you should have the PHPMyAdmin login screen.
Great!
Now, log in using your username and the system password, and you will be logged in to the phpMyAdmin dashboard.

**If you don’t have your system password, if you are using a Bitnami stack, you can use the following command to get your system password.
How to find the Bitnami system password to connect to AWS MySQL server?
The command that you need to type on your terminal, once you are connected to your remote instance, to get your system password is:
#sudo cat ./bitami_credentials
8 thoughts on “How to access phpMyAdmin for Amazon EC2 / Lightsail LAMP stack?”
Pingback: How To Fix Laravel 7.x Specified key was too long error?
Pingback: How To migrate a Website from Amazon EC2 To Lightsail on AWS
Pingback: MySQL ERROR 1114 (HY000) The table is full - How To Solve in XAMPP?
Pingback: amazon aws phpmyadmin login - bankschools.com
Pingback: amazon aws phpmyadmin login - Login and Portal
Pingback: [SOLVED] PhpMyAdmin Checksum Error 1030 While Accessing 'Privileges'
Hi there,
I was wondering if there was a way to access phpMyAdmin to connect to an AWS Ubuntu instance. I’ve tried googling but haven’t found anything specific.
Thanks!
Yes, you can.
This blog post should help – https://rajivverma.me/blog/tech/access-phpmyadmin-amazon-ubuntu-lamp/